



Blog, Guides for you
How to finish wallpaper in tricky spots: proven ways to get neat cuts
Wallpapering is a great way to transform a room quickly, but the real challenge starts where the wall meets obstacles. Precise cuts in corners, around door frames and at outlets decide whether the result looks professional or amateurish. Using the right tools and techniques will help you avoid ragged edges and unsightly gaps. In this article, you'll learn how to handle the trickiest parts of your walls so your home gets a perfect finish.

Finishing wallpaper in tricky spots at a glance
- At doors and ceilings, always leave an inch or two of extra material, then trim it perfectly straight by running a sharp knife along a metal putty knife held into the corner.
- When working around outlets, always switch off the power and remove the cover plates. Once the wallpaper is up, make a cross-shaped cut so you can trim the opening precisely for the cover plate.
- Installing decorative molding or baseboards is a clever way to hide uneven edges and protect the edges of the wallpaper from damage.
- If hairline gaps appear at the seams once the wallpaper dries, you can easily hide them with a thin layer of acrylic caulk in a color close to the wallpaper.
How to finish wallpaper around doors and windows
Finishing wallpaper around doors and windows means leaving extra material that you then trim precisely along the edge of the frame. Always hang the strip so it slightly overlaps the frame, and only then press it down with a rubber roller or brush. Use a sharp snap-off utility knife and guide it with a steady hand along a metal putty knife – that's how you get a perfectly straight line. If your wallpaper rolls have an intricate pattern, take extra care that the motif near the window doesn't get distorted as you smooth the strip into place.
How to finish wallpaper at the ceiling
When it comes to how to finish wallpaper at the ceiling, the best approach is to leave about 2-3 cm (roughly an inch) of excess at the top, which you trim off with a sharp tool after pressing it into the corner. This compensates for any unevenness in the ceiling, which you'll find in almost every building, even a new one. While you work, use a wide putty knife as a guide for the blade – it also keeps paste off the ceiling. If you're wondering which ceiling wallpaper will work best with your interior, go for patterns that visually enlarge the space. A proper wallpaper finish at the ceiling ensures the material won't start peeling off due to gravity or the natural circulation of warm air.
How to safely wallpaper around outlets and switches
In order to safely wallpaper around outlets and switches, you first need to switch off the power to the whole room and completely remove the outer covers of the switches and outlets. After you hang the wet strip, feel with your fingers for the electrical box and make a gentle cross-shaped cut at that point. Fold the resulting triangular flaps of paper or non-woven material outward and trim them off, taking care not to make the opening larger than the outlet's cover plate. Preparing the surface like this means living room wallpapers look flawless, and you avoid the risk of electric shock.
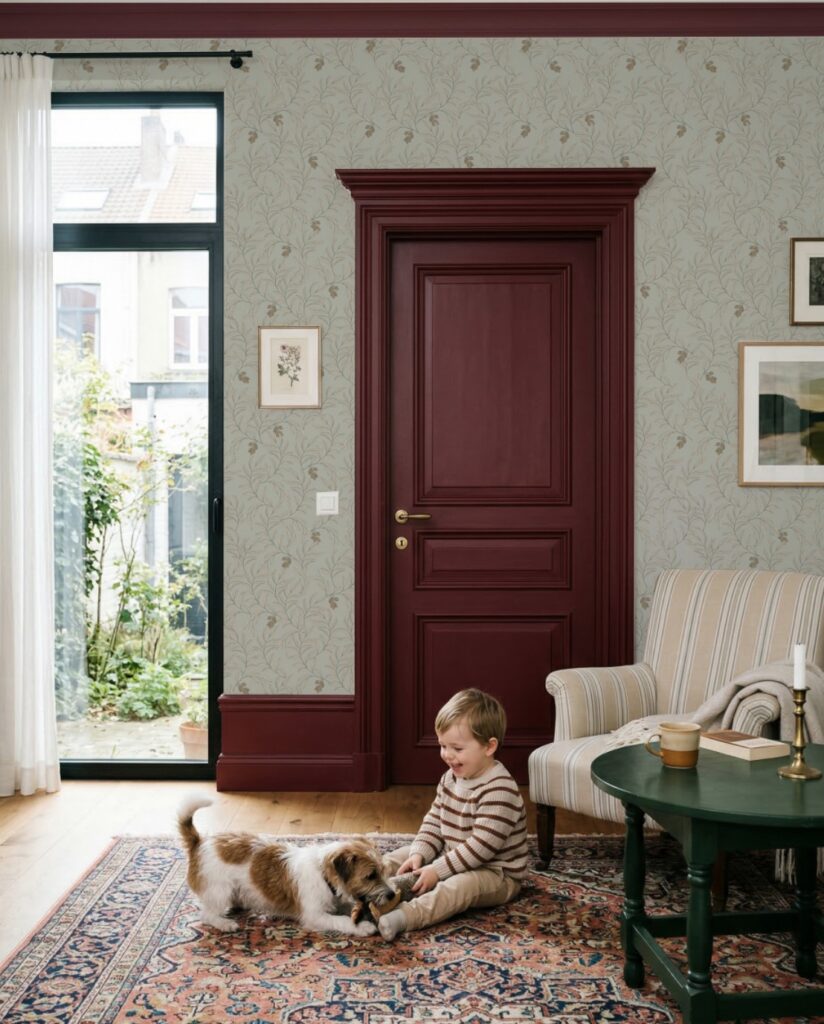
Finishing wallpaper with molding – an elegant way to complete the look
Finishing wallpaper with molding is an excellent way to hide uneven edges or create a stylish transition between different wall finishes. You can choose decorative polystyrene, polyurethane or wooden moldings, glued directly where the materials meet with a dedicated adhesive. This solution is often chosen when you're planning half-wall wallpaper in the bedroom, which gives the room a classic, almost palatial character. Molding doesn't just look good – it also protects the top edge of the wallpaper from damage and settling dust. It's also worth knowing how to finish wallpaper at a corner using corner profiles, which give the room a modern touch and protect the edges from knocks.
What to do when wallpaper seams don't line up perfectly – caulk and other tricks
If you notice that the edges of the material don't butt up against each other perfectly, the most effective fix is a thin layer of acrylic caulk in a color close to the wallpaper. It fills hairline gaps very well and hides minor installation mistakes caused by the paper shrinking as it dries. When you're wondering what to do about visible wallpaper seams, a special wallpaper finishing tape, which reinforces the seams and keeps them from lifting, can also help. A tougher challenge is wallpaper on a sloped wall, where matching the pattern precisely takes a lot of patience and often calls for the “overlap” technique, followed by a double cut through both layers. Below are a few proven steps that will make your work much easier:
- Always have a sharp utility knife and spare blades on hand to avoid tearing the edges.
- Use a soft, slightly damp cloth to wipe off excess paste as you go, before it has a chance to dry.
- In inside corners, never hang a full strip in one go – cut it precisely along the corner instead.
- If the pattern shifts, adjust the wet strip by gently sliding it with your palms flat.
- Use clear acrylic caulk for a neat finish where the wallpaper meets door frames.
How to trim wallpaper at the baseboards
Trimming wallpaper precisely at the baseboards works best after you've firmly pressed the material into the gap between the wall and the floor with a stiff metal putty knife. Many people wonder how to finish wallpaper here without leaving an unsightly white line of plaster – the simple key is to trim it with about a millimeter to spare and gently tuck that under the baseboard. If you're hanging kitchen wallpaper, make sure the bottom edge is especially well protected from moisture during everyday floor mopping. You can use sanitary silicone in a matching color for this, which creates an effective, durable waterproof barrier. Taking care with this small detail means the whole design will stand up to heavy use and stay fresh for years.
FAQ – frequently asked questions about finishing wallpaper in tricky spots
1. What should you use to finish wallpaper edges?
Wallpaper edges are best finished with a special edge-repair adhesive (in a tube) and a seam roller. Where the wallpaper meets another wall or the ceiling, decorative molding works perfectly.
2. Caulk or molding for finishing wallpaper?
It depends on the location and the look you want. Acrylic caulk works best in inside corners and along the ceiling, creating a subtle, paintable transition. Moldings are better for outside corners because they protect the edges from peeling and damage.
3. What tools do you need to trim wallpaper?
For precise trimming, you'll need a sharp utility knife and a wallpaper smoothing blade or metal straightedge to guide the cut along the edges. A ruler or a long level for marking straight lines and scissors for rough-cutting the strips will also come in handy.
