Blog, A guide for you
Vinyl wallpaper on interlining how to lay? Key tips on how to lay vinyl wallpaper!
Vinyl interlining wallpapers are very popular due to their durability and simplicity of installation. In this article we will help you step by step through the process of gluing them. You will learn how to prepare the substrate, what tools you will need, how to properly apply the adhesive and how to avoid the most common mistakes.
Key information about gluing vinyl wallpaper on interlining
-
Have you thought about laying wallpaper on interlining, but don't know where to start? The key element is proper preparation of the surface - it must be clean, dry and smooth. Neglecting this step can lead to wallpaper sticking problems and unsightly air bubbles.
-
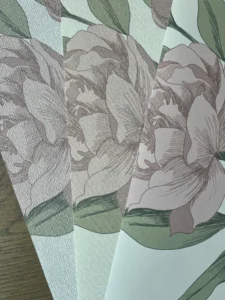
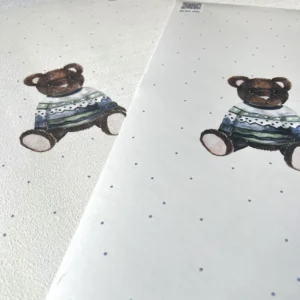
When applying the adhesive, use a roller or brush to get even coverage of the wall. Start wallpapering from the top, gently and gradually applying the wallpaper strip to the wall. Make sure that the patterns on each piece of wallpaper agree with each other, to avoid visible transition lines between them.
-
While gluing, Use a soft spatula or special brush to smooth the surface of the wallpaper and remove air bubbles. A calm and precise approach ensures that, at the end of the day, the wallpaper will look professional and durable.
Bonding fleece wallpaper -. substrate preparation
Preparation of the substrate is crucial for vinyl wallpaper on interlining or simply interlining to hold well and look aesthetically pleasing.
Before applying wallpaper, you need to make sure what the wall was painted with. If it was painted with latex paint, washable acrylic paint or paint with low porosity, the wallpaper adhesive may not bond to the wall and the wallpaper will fall off.
Of course, there is a way to do this. Just dull the wall well with sandpaper and then the wallpaper should already stick to the wall without any problems. It is worth testing this on a small piece of wallpaper at first. It is also important that about 30 days have passed since the last painting (minimum 20 days, but it depends on the paint and the manufacturer).
Continue to follow the instructions:
Step 1: Removal of old wallpaper. If the wall is wallpapered, the old wallpaper must be removed from the wall. This can be done with a wallpaper knife or with a special wallpaper remover. I especially recommend the second method, because the wallpaper will fall off without damaging the wall.
Step 2: Wall cleaning. The wall must be clean and free of dust. Use a damp cloth or sponge to remove any dirt.
Step 3: Removal of bumps. Uneven areas on the wall, such as holes or cracks, need to be filled with joint compound. After the compound dries, sand the spot to make it smooth.
|
|
||
|---|---|---|---|
| Wallpaper cutter | Removal of old wallpaper | ||
| Moist cloth | Cleaning the wall | ||
| Putty | Filling of holes and cracks | ||
| Sandpaper | Grinding of alignments |
Step 4: Priming the wall. The wall should be primed so that the adhesive will adhere better. Use a suitable primer according to the instructions on the package.
Preparation of the substrate is complete. The wall is now ready to lay wallpaper on interlining.
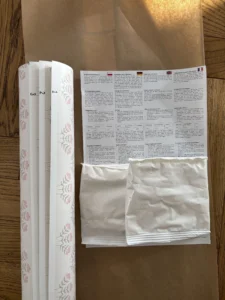
Tools and materials necessary for laying wallpaper
The most important tool will be wallpaper roller, which will allow you to apply the glue evenly. You can also use a brush.
Adhesive for wallpaper on interlining is also necessary to affix the wallpaper to the wall. It is important to choose an adhesive dedicated to this type of wallpaper. At Royal Rabbits, the right glue always comes with the wallpaper. 🙂
To cut the wallpaper you will need upholstery knife and metal ruler. These tools will allow you to precisely fit the wallpaper to the wall.
Measure will help you accurately measure your walls and cut your wallpaper accordingly. It is also worth having pencil, to mark the cutting points.
To smooth the laid wallpaper and get rid of air bubbles, it is best to use A special spatula or simply clean cloths. This will ensure that the wallpaper adheres well to the wall. Remember not to rub the glue into the wallpaper. If the glue gets on a cloth or spatula and you rub it into the wallpaper, you can damage it. That's why it's a good idea to prepare a supply.
If you rub interlining wallpaper for a long time, wet spots may appear on it. This means that the material has soaked up the glue heavily. We need to give it about a week to evaporate and then the colors will be even again.
Once the wallpaper is glued, it should be secured with a wallpaper brush. This tool will help to press the wallpaper evenly without damaging it.
Sponge i water will be needed to wipe off excess glue. This, of course, does not mean that we can wipe the wallpaper with a wet sponge. We can only gently pick up the glue and continue gluing cleanly.
Make sure the wallpaper is straight and properly matched to the pattern, if there is one.
|
Tools and materials needed |
|---|
|
Wallpaper roller |
|
Glue brush |
|
Adhesive for wallpaper on interlining |
|
Upholstery knife |
|
Metal ruler |
|
Measure and pencil |
|
Rubber roller or wallpaper roller |
|
Wallpaper brush |
|
Sponge and water |
Keeping these tools and materials in mind will make it much easier to lay vinyl wallpaper on interlining and ensure a professional result.
How to lay wallpaper on interlining? Application process
The process of applying vinyl wallpaper is simple if you follow all the steps carefully. It is important to properly apply the adhesive, install the wallpaper and finish and clean the surface.
Application of glue
Before applying wallpaper, make sure the wall is smooth and dry. Choose an adhesive that is designed for vinyl wallpaper on interlining. Apply the adhesive to the wall with a roller or brush, trying to make the layer even.
Avoid liquefying the glue, which can cause unevenness under the wallpaper.
It is important to apply glue only to the surface where you intend to put the wallpaper strip, to avoid drying the glue too quickly. It is also important not to apply too much glue, which can lead to air bubbles.
Installation of wallpaper
When the glue is applied, Gently apply the first strip of wallpaper to the wall, starting from the top. Make sure the wallpaper is straight and properly aligned with the pattern, if any. Use a soft cloth or roller to smooth the wallpaper and remove air bubbles.
Press the wallpaper over its entire surface, Paying attention to the corners and edges.
Successive strips of wallpaper should be applied in such a way as to cut them precisely at the edges. Avoid over-stretching the wallpaper to avoid distorting the pattern or material.
Finishing and cleaning
After all strips of wallpaper have been applied Check that all edges are well glued. If you find any air bubbles, try smoothing them out with a roller or gently piercing them with a needle and leveling them out.
Remember to leave the wallpaper to fully dry before proceeding with further work finishing touches in the room.
Frequently asked questions about gluing vinyl wallpaper on interlining
How to properly lay vinyl wallpaper on interlining?
To properly lay vinyl wallpaper on interlining, make sure the surface is clean and dry. Wallpapering begins by applying the adhesive to the wall, not the wallpaper. The wallpaper is then adhered from the top, pressing gently to avoid air bubbles.
Do we lubricate vinyl wallpaper with glue?
This depends on the type of wallpaper backing. If the vinyl wallpaper is on a paper backing, both the wallpaper and the wall are lubricated, while if it is on an interlining backing, the glue is applied only to the wall.
Which adhesive for vinyl wallpaper on interlining?
For vinyl wallpaper on interlining, a special adhesive for interlining wallpaper will be the best. This glue has the right consistency and adhesive strength, so that the wallpaper will adhere well to the wall.
What are the techniques for applying adhesive to vinyl wallpaper?
Vinyl interlining wallpaper adhesive is applied directly to the wall with a roller or large brush. The glue must be evenly distributed to avoid unevenness. Each strip of wallpaper should be glued immediately after applying the glue.
What problems can occur when gluing vinyl wallpaper?
When wallpapering the walls, air bubbles, unevenness and problems with pattern matching can occur. It is important to press the wallpaper properly and carefully trim the edges. In case of mistakes, the wallpaper can be moved slightly before the glue dries completely.
How to cover up the joints of vinyl wallpaper on interlining?
To cover up the joints, carefully match the wallpaper pattern and make sure that the edges are well pressed against the wall. You can also use special tools to smooth out the joints. It is important that the glue does not stick out from under the edges of the wallpaper.